|
|
|
 |
Changing LEDS |  |
|
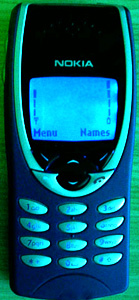
Factory style too boring for you? Cell phones. It used to be, you would turn heads just having one, now, You have sites like www.boltblue.com and www.yourmobile.com to enhance your handsets software! You can go even further with faceplates and custom housings and antennas! The next step that has evolved is lighting. Yes lighting. Something so small can drastically change the look of your handset! Have a look... |
|
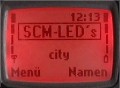
 Nice, eh? It is actually pretty easy to do, if you have the time and patience to learn! But I will tell you everything you need to know about how to do it!!! |
|
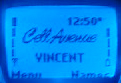 Looks great at night!! |
|
 |
|
 |
|
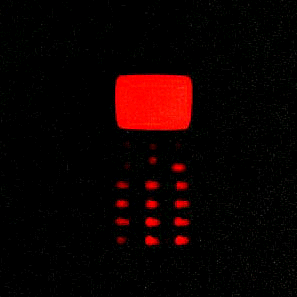
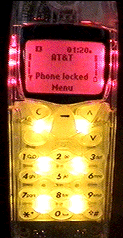 Even multi-color! |
|
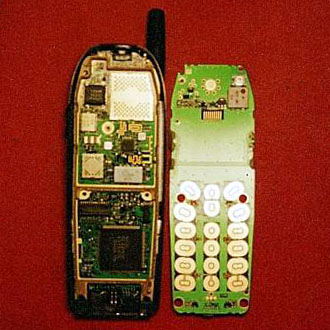 Inside your handset! |
|
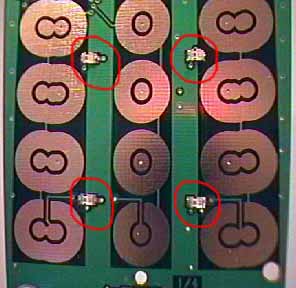 Circled are the keypad leds. LED Instructions LED Art 101 Okay, so you want to try it yourself. No problem, almost anyone can do this with some practice. Here it is: Unscrew the back 4 case screws and remove the faceplate. Now you will see the chrome board screws at the top, remove them. Now that your keypad board is free, you will need to remove the LCD (liquid crystal display) Look at the back of the board where the LCD is attached, you will notice the 2 tabs on each side pushed outward onto the board. With your fingernails gently pull them outward away from the board. Pull one side them the other the LCD will come off the board. Don't worry if you bend the metal cage a little, it will bend back. Now on the 5100 series there is a white film, carefully peel it off the board and put it aside. You do not want to solder with this on the board, it will melt. When re-attaching this white film, be sure to match up the buttons of the key contacts as close to center as possible. Notice the size difference in the two LEDs the larger of the 2 is know as a 0805 the smaller is a 0603, these are industry standard sizes. Removing them is not too bad, all you need is a sewing pin to pry them off and a soldering iron to heat the solder points (use a fine solder point). Start soldering the LEDs off by placing the pin in the center of the LED at its base. Heat one side at a time gently prying upward with the pin. Do the same with the opposite side of the LED, it will come off fairly easily. I have found that a 20 watt Radio Shack soldering iron with a fine tip works very well. New fine point tips are only .99 . Do not try to poke or pry the LED off too hard, the solder point itself will come off, and it's a pain to fix. When soldering the old LEDs off there should be enough solder left behind, on the board to hold the new LED in place. If there is not enough, you can use silver solder. Make sure you use a fine strand of solder. You do not want to glob the solder on. If there is too much the board will short and do funny things, like shuting off or showing garbage on the screen. To install the new LED look at the front of the LED, you will see a dot inside or on the side of the LED, this is the cathode mark. On a normal LED, face all the LCD backlight LEDs upward on the left and down on the right, see the diagram above. The keypad LEDs should all be facing to the left. On some LEDs such as our red, the anode is market, which means the lED should be installed opposite of what is shown here. To solder the LEDs on, take 1 single LED out and place it on the board where you want to solder it (do this will all LEDs, one at a time. You can easily sneeze away 12 LEDs in a second. And try to find them, Ha Ha Ha!) I normally follow this patter to solder: 1) Left LCD side (turn the board sideways so these LEDs are horizontal and at the top, work left to right), 2)Flip the board so the right side of the LCD lights are at the top, again soldering left to right, 3) Flip the board upside down and solder from top left to bottom left then top right to bottom right. Keep in mind the cathod markings if you flip the board upside down, they will be oposite, now facing to the right. The reason behind this pattern is that you do not hit the other LEDs as easily, it keeps the heat away from the other solder points. Any questions please contact me: |